If a former member of your research group has used Findings in the past, you may sometimes want to access their research without necessarily loading it all up in your own library. There are at least two options for you:
Method 1. Create a PDF of all entries with all the attachments.
Method 2. Temporarily accessing the archived library instead of yours.
Method 1 is covered in a separate topic (just click the link above!), and in this post, we will cover Method 2…
Getting to the Findings configuration folder on disk
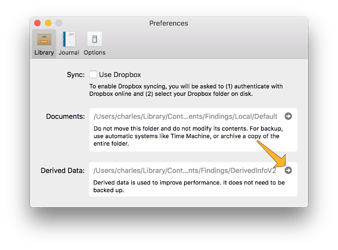
The first step is to understand where Findings gets the data that is displayed when you run the application. For this, open the menu Findings, then choose the menu item Preferences…, and select the Library tab. In that tab, Click the arrow in the box labeled Derived Data, as shown in the screenshot below.
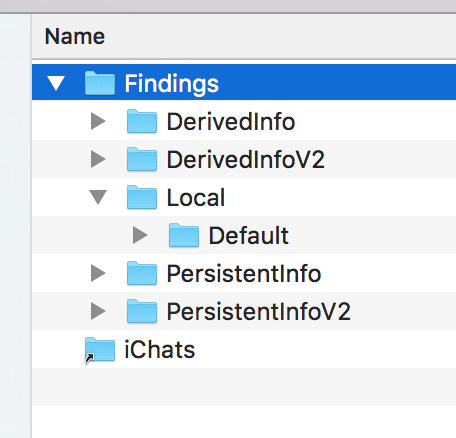
This will open a folder called “Findings”, located inside the standard location set up by macOS, specifically in ~/Library/Containers/com.findings.Findings. The “Findings” folder contains various subfolders, which are used by Findings to set up your library. If you do not use Dropbox, one of the subfolder is called ‘Local’ and has a subfolder called ‘Default’, which itself contains all your critical data: entries, protocols, timers and collections.

Setting up a new library
We are now going to create a new, separate library, that we will use to host the data from another person (e.g. a former lab member). This is very simple:
- Quit Findings
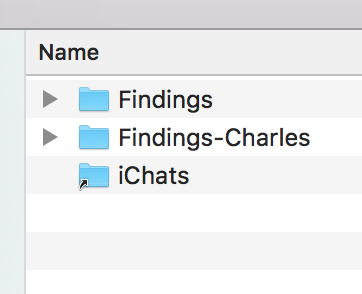
- In the Finder, rename the folder “Findings” to include your name, e.g. “Findings-zzzz” if your name is ‘zzzz’
- Start Findings again
The app will have no content, and if you check back in the Finder, you will see a new ‘Findings’ folder has been created. This is the new library! We can now populate it with content from another library.

Importing from a library backup
I will assume here you have access to a backup of their library, namely the folder ‘Default’ that was mentioned above. You have 2 options to get that data into the new library
Option 1. Quit Findings, then simply replace the ‘Default’ folder on disk with the ‘Default’ folder from the backup. Then open Findings again.
Option 2. Drag that folder into the Findings icon in the Dock. You will then see a dialog listing all the entries and protocols ready for import. Just click Import, and all the data will be added to the new library we have just set up.
Note that option 2 will not include the collections (this is something that will be addressed in a future update).
In both cases, it can take a while for the whole library to appear in Findings, as the app is scanning the content and building a cache and search index with all the documents.
Switching between libraries
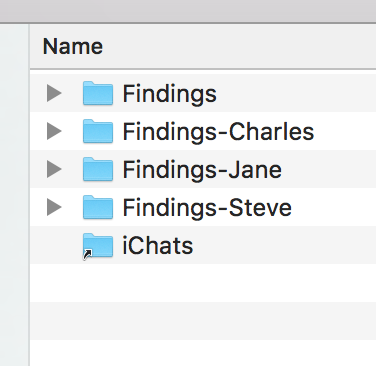
You can repeat the above for as many libraries as you need. To switch between multiple libraries, you always follow the same procedure:
- Quit Findings — DO NOT FORGET THIS STEP!
- In the Finder, rename the folder “Findings” to include the name of the library, e.g. “Findings-some_name”
- Rename the library you want to use to be just ‘Findings’
- Start Findings again
The current library will then be the one that corresponds to the folder that you renamed ‘Findings’.

Caveats and notes
You have to be very careful with the above procedure. It is critical that you quit Findings when switching between libraries, and not change the name of the folder while Findings is running. You may otherwise corrupt your Findings data.
The above trick will work for any version of Findings. It is possible library switching will be made easier in future versions of Findings. Stay tuned!

 Maybe I’ll have to find a different name to distinguish from the archive format used for the export functionality.